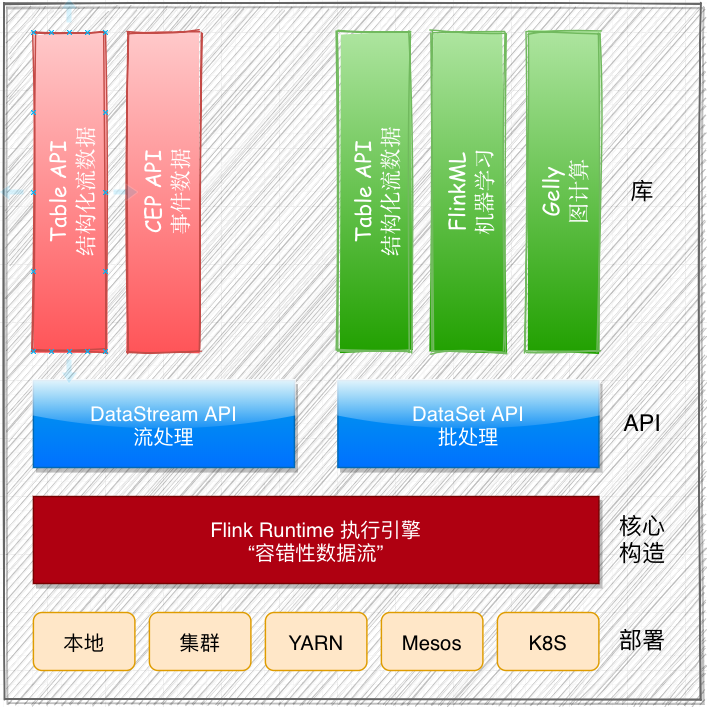
0x00 资源划分
0x01 安装准备
下载软件
https://s3-cn-bj.ufileos.com/usdp-free/usdp-2.X/epel.tgz
https://s3-cn-bj.ufileos.com/usdp-free/usdp-2.X/httpd-rpms.tar.gz
https://s3-cn-bj.ufileos.com/usdp-free/usdp-2.X/mirror.tgz
https://s3-cn-bj.ufileos.com/usdp-free/usdp-2.X/usdp-01-master-privatization-free-2.X.tar.gz
服务器免密登录配置
ssh-keygen的命令可选项
1
2
3
4
5
6
7
8
9
10
-b:指定密钥长度; -e:读取openssh的私钥或者公钥文件; -C:添加注释; -f:指定用来保存密钥的文件名; -i:读取未加密的ssh-v2兼容的私钥/公钥文件,然后在标准输出设备上显示openssh兼容的私钥/公钥; -l:显示公钥文件的指纹数据; -N:提供一个新密语; -P:提供(旧)密语; -q:静默模式; -t:指定要创建的密钥类型。
ssh-copy-id 命令可以把本地主机的公钥复制到远程主机的 authorized_keys 文件上。authorized_keys 文件用来验证 client 。使用 ssh-copy-id 命令将本地公钥复制到远程主机之后可以实现免密登录远程主机。如果不传入 -i 参数,ssh-copy-id 使用默认 ~/.ssh/identity.pub 作为默认公钥。如果多次运行 ssh-copy-id ,该命令不会检查重复,会在远程主机中多次写入 authorized_keys 。
注意,本地 ~/.ssh/id_rsa 的权限,chmod 400 ~/.ssh/id_rsa ,该文件包含用于授权的私钥,如果该文件可以被其他用户访问,ssh 会忽略该私钥。
1 ssh-copy-id [ -i [identity_file] ] [user@] machine
-i 指定公钥文件
1 ssh-copy -id -i ~/.ssh/id_rsa.pub 想要免密登录的IP地址
批量脚本:
1
2
3
4
5
6
7
8
9
10
# !/bin/bash # host填写实际想要免密登录的ip host=(10.20.210.41 10.20.210.42 10.20.210.43 10.20.210.44 10.20.210.45 10.20.210.46 10.20.210.47 10.20.210.48 10.20.210.49 10.20.210.50) ssh-keygen -t rsa # 迭代操作 for i in ${!host[@]} do ssh-copy-id -i ~/.ssh/id_rsa.pub ${host[$i]} done
0x02 初始化服务器
1
2
3
4
5
6
7
8
9
10
11
12
13
14
15
16
17
18
19
20
21
22
23
24
25
26
27
28
29
[root@cyhl-UC-dev2 2.0.0.0] total 5924664 -rwxr-xr-x. 1 root root 25259200 Dec 29 2021 alertmanager-0.21.0.tar.gz -rwxr-xr-x. 1 root root 240125145 Dec 29 2021 dolphinscheduler-2.0.0.tar.gz -rwxr-xr-x. 1 root root 233028904 Dec 29 2021 elasticsearch-7.8.0.tar.gz -rwxr-xr-x. 1 root root 350492342 Dec 29 2021 flink-1.13.2.tar.gz -rwxr-xr-x. 1 root root 115504858 Dec 29 2021 flume-1.9.0.tar.gz -rwxr-xr-x. 1 root root 61013129 Dec 29 2021 grafana-6.5.1.tar.gz -rwxr-xr-x. 1 root root 374178721 Dec 29 2021 hadoop-3.1.1.tar.gz -rwxr-xr-x. 1 root root 275883533 Dec 29 2021 hbase-2.1.10.tar.gz -rwxr-xr-x. 1 root root 551856377 Dec 29 2021 hive-3.1.2.tar.gz -rwxr-xr-x. 1 root root 411764709 Dec 29 2021 hue-4.8.0.tar.gz -rwxr-xr-x. 1 root root 62354058 Dec 29 2021 influxdb-1.8.0.tar.gz -rwxr-xr-x. 1 root root 56059458 Dec 29 2021 kafka-2.11-2.0.1.tar.gz -rwxr-xr-x. 1 root root 81017190 Dec 29 2021 kafkaeagle-2.0.6.tar.gz -rwxr-xr-x. 1 root root 152764439 Dec 29 2021 kibana-7.8.0.tar.gz -rwxr-xr-x. 1 root root 138395860 Dec 29 2021 neo4j-3.5.28.tar.gz -rwxr-xr-x. 1 root root 9294397 Dec 29 2021 node_exporter-1.0.0.tar.gz -rwxr-xr-x. 1 root root 436354166 Dec 29 2021 phoenix-5.0.0.tar.gz -rwxr-xr-x. 1 root root 73933586 Dec 29 2021 prometheus-2.18.1.tar.gz -rwxr-xr-x. 1 root root 296207727 Dec 29 2021 ranger-2.1.0.tar.gz -rwxr-xr-x. 1 root root 198399978 Dec 29 2021 spark-3.0.1.tar.gz -rwxr-xr-x. 1 root root 130810729 Dec 29 2021 sqoop-1.4.7.tar.gz -rwxr-xr-x. 1 root root 59933398 Dec 29 2021 tez-0.10.0-dependency.tar.gz -rwxr-xr-x. 1 root root 73299986 Dec 29 2021 tez-0.10.0.tar.gz -rwxr-xr-x. 1 root root 104655285 Dec 29 2021 usdpmonitor-1.0.0.tar.gz -rwxr-xr-x. 1 root root 1507933439 Dec 29 2021 zeppelin-0.9.0.tar.gz -rwxr-xr-x. 1 root root 8832788 Dec 29 2021 zkui-2.0.0.tar.gz -rwxr-xr-x. 1 root root 37441452 Dec 29 2021 zookeeper-3.4.13.tar.gz
1
2
3
4
5
6
7
8
9
10
11
12
13
14
15
16
17
18
19
20
21
22
23
24
25
26
27
28
29
30
31
[root@cyhl-UC-dev2 usdp] total 4 drwxr-xr-x. 2 root root 33 Dec 29 2021 agent drwxr-xr-x. 2 root root 136 Dec 31 2021 bin drwxr-xr-x. 2 root root 65 Dec 29 2021 config drwxr-xr-x. 2 root root 137 Dec 29 2021 jmx_exporter drwxr-xr-x. 3 root root 21 Dec 29 2021 license drwxr-xr-x. 2 root root 6 Dec 29 2021 logs drwxr-xr-x. 2 root root 35 Dec 29 2021 recommend drwxr-xr-x. 7 root root 73 Dec 29 2021 repair drwxr-xr-x. 3 root root 21 Dec 29 2021 repository drwxr-xr-x. 2 root root 4096 Dec 29 2021 scripts drwxr-xr-x. 2 root root 34 Dec 29 2021 server drwxr-xr-x. 2 root root 29 Dec 29 2021 sql drwxr-xr-x. 4 root root 32 Dec 29 2021 templated drwxr-xr-x. 2 root root 6 Dec 29 2021 verify drwxr-xr-x. 2 root root 79 Dec 31 2021 versions [root@cyhl-UC-dev2 usdp] [root@cyhl-UC-dev2 repair] total 8 drwxr-xr-x. 2 root root 4096 Dec 29 2021 bin drwxr-xr-x. 2 root root 105 Dec 29 2021 config drwxr-xr-x. 2 root root 4096 Dec 30 2021 packages drwxr-xr-x. 2 root root 189 Dec 29 2021 remove drwxr-xr-x. 2 root root 23 Dec 30 2021 sbin [root@cyhl-UC-dev2 config] [root@cyhl-UC-dev2 config] total 12 -rwxr-xr-x. 1 root root 723 Dec 29 2021 repair-host-info-add.properties -rwxr-xr-x. 1 root root 507 Dec 29 2021 repair-host-info.properties -rwxr-xr-x. 1 root root 666 Dec 29 2021 repair.properties
1 2 3 4 5 6 7 8 9 10 11 12 13 14 15 16 17 18 19 20 21 22 23 24 25 26 27 yum.repo.host.ip =10.20.210.50 namp.server.ip =10.20.210.50 namp.server.port =22 namp.server.password =password ntp.master.ip =10.20.210.50 mysql.ip =10.20.210.50 mysql.host.ssh.port =22 mysql.host.ssh.password =password mysql.password =usdp@passwd repair.host.num =9 repair.add.host.num =0 repair.log.dir =./logs
1 2 3 4 5 6 7 8 9 10 11 12 13 14 15 16 17 18 19 20 21 22 23 24 25 26 27 28 29 30 31 32 33 34 35 36 37 38 39 40 41 42 43 44 45 46 47 48 49 50 51 52 usdp.ip.1 =10.20.210.41 usdp.password.1 =password usdp.ssh.port.1 =22 usdp.ssh.port.hostname.1 =cyhl-PDH-dev1 usdp.ip.2 =10.20.210.42 usdp.password.2 =password usdp.ssh.port.2 =22 usdp.ssh.port.hostname.2 =cyhl-PDH-dev2 usdp.ip.3 =10.20.210.43 usdp.password.3 =password usdp.ssh.port.3 =22 usdp.ssh.port.hostname.3 =cyhl-PDH-dev3 usdp.ip.4 =10.20.210.44 usdp.password.4 =password usdp.ssh.port.4 =22 usdp.ssh.port.hostname.4 =cyhl-PDH-dev4 usdp.ip.5 =10.20.210.45 usdp.password.5 =password usdp.ssh.port.5 =22 usdp.ssh.port.hostname.5 =cyhl-DS-dev1 usdp.ip.6 =10.20.210.46 usdp.password.6 =password usdp.ssh.port.6 =22 usdp.ssh.port.hostname.6 =cyhl-DS-dev2 usdp.ip.7 =10.20.210.47 usdp.password.7 =password usdp.ssh.port.7 =22 usdp.ssh.port.hostname.7 =cyhl-DS-dev3 usdp.ip.8 =10.20.210.48 usdp.password.8 =password usdp.ssh.port.8 =22 usdp.ssh.port.hostname.8 =cyhl-DS-dev4 usdp.ip.9 =10.20.210.49 usdp.password.9 =password usdp.ssh.port.9 =22 usdp.ssh.port.hostname.9 =cyhl-UC-dev1 [root@cyhl-UC-dev2 config]#
安装失败问题排查处理
缺少wget
原本的操作系统,是可以安装wget等命令的,但是当我们执行bash repair initAll之后,原来的仓库放在一个备份目录下,如果此时由于repo的一些异常导致安装失败,我们需要wget下载一些东西的时候,也会出现问题,所以,我们需要把当前的usdp.repo仓库备份,把/etc/yum.repos.d/backup/下面的**.repo**文件移到/etc/yum.repos.d/目录。然后重建仓库。
1
2
$ yum clean all $ yum makecache
缺少repodata数据
安装过程中,缺少epel包下面的repodata/repomd.xml,我们在/var/www/html/epel/7/x86_64/目录下生成对应的repomd.xml,此处需要安装一个命令:createrepo 。
1 $ yum install createrepo -y
然后,进入到/var/www/html/epel/7/x86_64/这个目录,执行:
1
2
3
4
5
6
7
8
9
10
11
$ createrepo /var/www/html/epel/7/x86_64 Spawning worker 0 with 1680 pkgs Spawning worker 1 with 1680 pkgs Spawning worker 2 with 1679 pkgs Spawning worker 3 with 1679 pkgs Workers Finished Saving Primary metadata Saving file lists metadata Saving other metadata Generating sqlite DBs Sqlite DBs complete
为什么是/var/www/html/epel/7/x86_64这个目录?因为在/etc/yum.repos.d/usdp.repo 中有如下内容:
1
2
3
4
5
6
7
8
9
10
11
12
13
14
15
16
17
18
19
20
21
22
23
24
[usdp-base] name =usdp-base baseurl =http://mirrors.ucloud.cn:8000/centos/7/os/x86_64/ gpgcheck =1 gpgkey =file:///etc/pki/rpm-gpg/RPM-GPG-KEY-CentOS-7 [usdp-updates] name =usdp-updates baseurl =http://mirrors.ucloud.cn:8000/centos/7/updates/x86_64/ gpgcheck =1 gpgkey =file:///etc/pki/rpm-gpg/RPM-GPG-KEY-CentOS-7 [usdp-extras] name =usdp-extras baseurl =http://mirrors.ucloud.cn:8000/centos/7/extras/x86_64/ gpgcheck =1 gpgkey =file:///etc/pki/rpm-gpg/RPM-GPG-KEY-CentOS-7 [usdp-epel] name =usdp-epel baseurl =http://mirrors.ucloud.cn:8000/epel/7/x86_64/ failovermethod =priority enabled =1 gpgcheck =0
由此我们也可以看出,usdp是启动了一个httpd服务,作为仓库地址的,这个在/etc/hosts中有绑定127.0.0.1 mirrors.ucloud.cn。
安装pssh
1
2
3
4
5
$ wget https://files.pythonhosted.org/packages/60/9a/8035af3a7d3d1617ae2c7c174efa4f154e5bf9c24b36b623413b38be8e4a/pssh-2.3.1.tar.gz $ mkdir -p /usr/local/pssh $ tar xf pssh-2.3.1.tar.gz -C /usr/local/pssh $ cd pssh-2.3.1/ $ python setup.py install
安装过程必须要root密码
配置初期,服务器之间设置了免密登录,但是安装依然失败,在usdp社区看了别人的问答,官方答复目前仅仅支持密码安装,不能通过免密安装😖。
重新配置repair.properties和repair-host-info.properties文件,将root用户的密码配置进去。
重新初始化


