离线安装OpenSearch和k-NN插件
Open Distro 项目将 Elasticsearch 和 Kibana 的开源发行版与 Apache-2.0 许可插件捆绑在一起,为用户提供企业级功能、安全性和分析工具。自推出以来的两年中,世界各地的开发者都使用 Open Distro 来支持他们的应用程序。
开源 Elasticsearch 和 Kibana 7.10.2 即将结束生命周期,不再接受积极的开发、安全补丁或错误修复。所有用户都应该运行能够及时收到安全补丁的软件。启动 OpenSearch 项目的目的是为开源 Elasticsearch 和 Open Distro 用户提供一条前进的道路,以确保他们始终能够获得安全性和新的创新。
以上引用官网文档《https://opendistro.github.io/for-elasticsearch/#prod》
x000 下载软件包
K-NN是Amazon公司开发并开源的一款支持ElasticSearch的相似向量检索插件,而且搜索速度和效果比ElasticSearch原生的插件更好,为产品推荐、欺诈检测、图像和视频搜索、相关文档搜索等场景提供支持。
根据官方的描述,k-NN非常符合我们的业务场景——图像的黑样本检测。离线或者在线黑样本图像入库并打标签属性,入库时提取图像特征(256维度)并将其和标签属性一起保存到ElasticSearch中,业务的每一笔调用(调用ES检索之前先通过算法提取特诊,实际上是特征维度的向量检索)通过检索ES黑样本库,判定检索的图像是否在黑样本中。
和k-NN插件能够配套的ElasticSearch是社区版,由Amazon维护,属于Open Distro 项目,因此软件名为opendistro-for-elasticsearch, 现在改为OpenSearch。官网为:https://opendistro.github.io/for-elasticsearch-docs/docs/elasticsearch/,看清楚咯,不是ElasticSearch的官网。
我们的服务是X86位的架构,操作系统为CentOS 7x 64位,因此我们选择x64的软件包。在决定安装之前,我们需要知道我们应该用哪个版本:目前opendistro-for-elasticsearch的版本为1.13.0.0,主要包括下面软件包:
| 包名 | 版本 | 类型 |
|---|---|---|
| Elasticsearch (Apache 2.0 licensed code only) | v7.10.2 | 主包 |
| Alerting Plugin | v1.13.1.0 | 插件 |
| Anomaly Detection Plugin | v1.13.0.0 | 插件 |
| Asynchronous Search Plugin | v1.13.0.1 | 插件 |
| Index Management Plugin | v1.13.2.0 | 插件 |
| Job Schedular Plugin | v1.13.0.0 | 插件 |
| k-NN Plugin | v1.13.0.0 | 插件 |
| Performance Analyzer | v1.13.0.0 | 插件 |
| Reports Scheduler Plugin | v1.13.0.0 | 插件 |
| SQL & Piped Processing Language Plugin | v1.13.2.0 | 插件 |
| Security Plugin | v1.13.1.0 | 插件 |
根据我们已运行项目安装版本,ElasticSearch7.10.2满足要求,搭配的k-NN为1.13.0.0,我们只需要下载opendistroforelasticsearch-1.13.3-linux-x64.tar.gz该软件包即可满足。
下载压缩包
1 | curl https://d3g5vo6xdbdb9a.cloudfront.net/tarball/opendistro-elasticsearch/opendistroforelasticsearch-1.13.3-linux-x64.tar.gz -o opendistroforelasticsearch-1.13.3-linux-x64.tar.gz |
下载校验包
1 | curl https://d3g5vo6xdbdb9a.cloudfront.net/tarball/opendistro-elasticsearch/opendistroforelasticsearch-1.13.3-linux-x64.tar.gz.sha512 -o opendistroforelasticsearch-1.13.3-linux-x64.tar.gz.sha512 |
校验压缩包
1 | shasum -a 512 -c opendistroforelasticsearch-1.13.3-linux-x64.tar.gz.sha512 |
输出:opendistroforelasticsearch-1.13.3-linux-x64.tar.gz: OK 表示该包没有问题!
0x001 安装OpenSearch
安装用户:admin,软件包目录:/home/admin/softwares/
解压opendistroforelasticsearch-1.13.3-linux-x64.tar.gz:tar -zvf opendistroforelasticsearch-1.13.3-linux-x64.tar.gz,并在目录下运行安装脚本./opendistro-tar-install.sh。
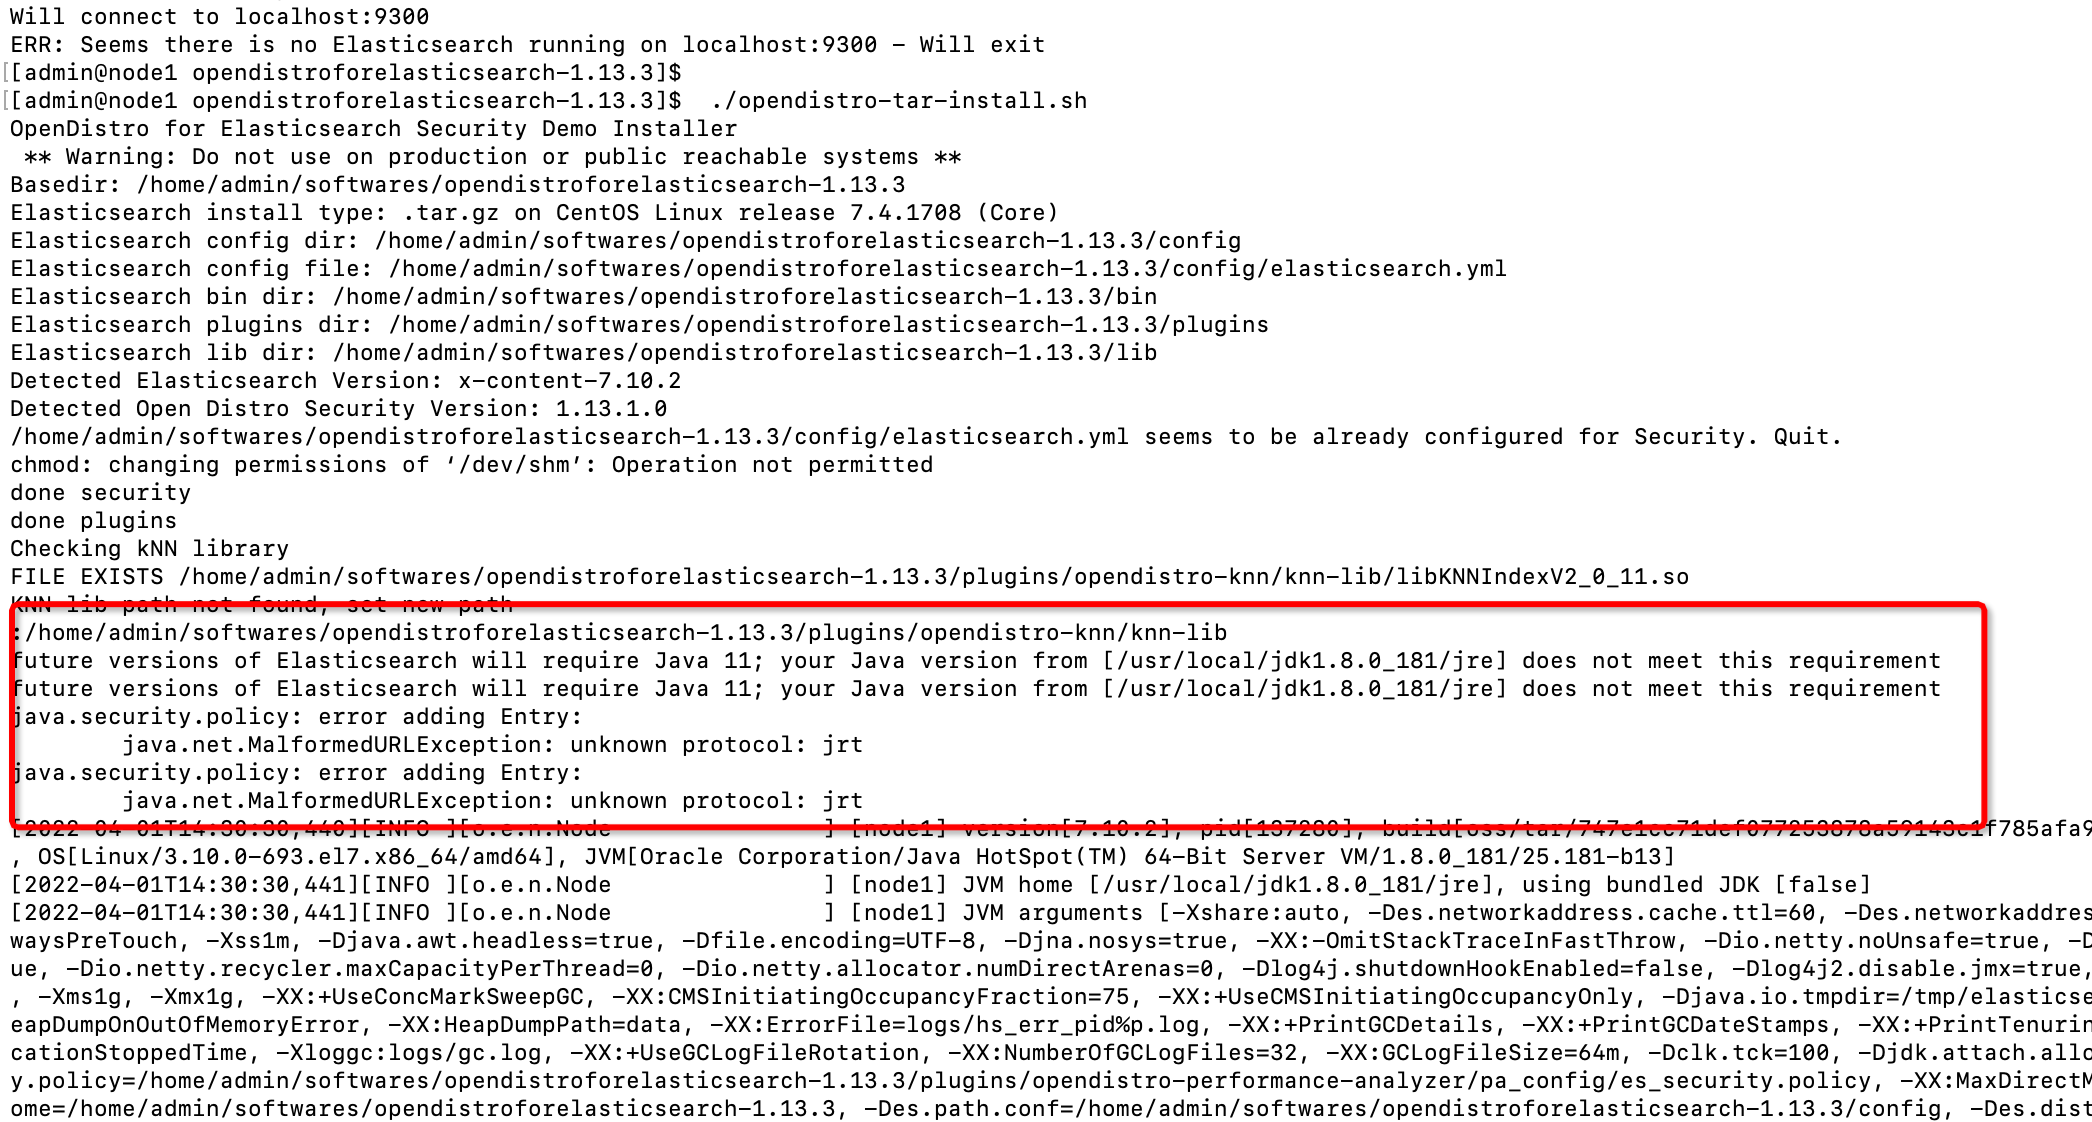
意思是当前环境jdk的版本是1.8,es需要的版本是java 11,不满足要求。实际上,我们下载的ES包中已经包含了openJDK,我们使用内置的JDK即可。因此安装过程中,现在会话Session中把已有的JAVA_HOME和CLASSPATH两个环境变量设置为空。
1 | unset JAVA_HOME |
我们新打开一个命令控制台,执行下面命令看看ES是否启动成功:
1 | curl -XGET https://localhost:9200 -u 'admin:admin' --insecure |
出现错误:curl: (56) Received HTTP code 503 from proxy after CONNECT
错误原因:我们的机器上设置了代理,通过命令查看:env | grep -I proxy
all_proxy=http://10.57.22.219:3128/
socket_proxy=http://10.57.22.219:3128/
https_proxy=http://10.57.22.219:3128/
http_proxy=http://10.57.22.219:3128/
解决方法:
1 | unset all_proxy |
再次访问:curl -XGET https://localhost:9200 -u 'admin:admin' --insecure
1 | [admin@node1 ~]$ curl -XGET https://localhost:9200 -u 'admin:admin' --insecure |
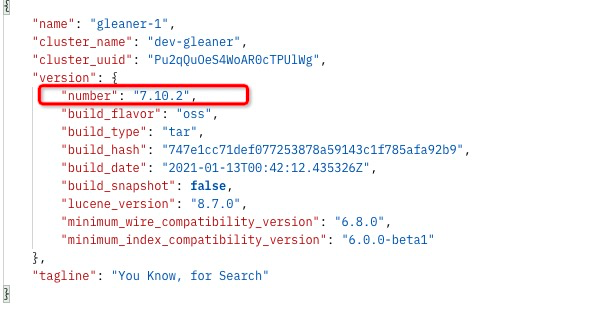
查看插件版本:
1 | [admin@node1 ~]$ curl -XGET https://localhost:9200/_cat/plugins?v -u 'admin:admin' --insecure |
0x002 配置ES
单机配置
配置ES可以在config/elasticsearch.yml或者在启动命令中通过参数-E指定,例如:
1 | ./opendistro-tar-install.sh -Ecluster.name=prod-siamat -Enode.name=siamat-1 -Ehttp.host=0.0.0.0 -Ediscovery.type=single-node |
- cluster.name 集群名称
- node.name 节点名称
- http.host 暴露IP地址
- discovery.type 暴露类型
1 | [admin@node1 ~]$ curl -XGET https://localhost:9200 -u 'admin:admin' --insecure |
配置文件,其他的配置使用默认即可:
1 | # 集群名称: |
集群配置
ES单机上的集群配置,需要复制ES解压后的包(想要几个节点需要复制几份)。我们需要配置三个节点的集群,那么我们复制三分ES软件包,分别命名:opendistroforelasticsearch-1.13.3、 opendistroforelasticsearch-1.13.3_9201_9301、和opendistroforelasticsearch-1.13.3_9202_9302,命名规则后面为http端口号_TCP端口号。
修改软件包config/elasticsearch.yml配置文件,根据我们包的命名规则分别修改对应包下的http端口、TCP端口、节点名称以及节点属性是master还是data,其他的配置项保持一致。
1 | # ======================== Elasticsearch Configuration ========================= |
各节点配置好之后启动:./opendistro-tar-install.sh -d
在ES启动时发现如下错误:
org.elasticsearch.transport.RemoteTransportException: [simat-1][172.17.8.1:9300][internal:cluster/coordination/join]
Caused by: java.lang.IllegalArgumentException: can’t add node {simat-2}{L9o4bu-kSg6d5SDhZd5a0w}{iFLfAd-MQCirpfW5VjzH2A}{172.17.8.1}{172.17.8.1:9301}{dir}, found existing node {simat-1}{L9o4bu-kSg6d5SDhZd5a0w}{P7M5kFcjRwG2Gghsm9VCfw}{172.17.8.1}{172.17.8.1:9300}{dimr} with the same id but is a different node instance

问题出现的原因是,复制虚拟机时,elsticsearch时,将elsticsearch文件夹下的data文件夹一并复制了。而在前面测试时,data文件夹下已经产生了data数据,于是报上面的错误。
解决办法:删除elsticsearch文件夹下的data/nodes文件夹下的节点数据,重启即可。
1 | [admin@node1 data]$ cd nodes/ |
启动后,测试各节点是否正常启动。如果配置没有禁用ssl以及鉴权认证,则需要访问:curl -XGET https://localhost:9201 -u 'admin:admin' --insecure,否则直接curl -XGET http://localhost:9201 即可。
1 | [admin@node1 ~]$ curl -XGET https://localhost:9201 -u 'admin:admin' --insecure |
1 | [admin@node1 ~]$ curl -XGET https://localhost:9202 -u 'admin:admin' --insecure |
0x003 系统参数调整
修改JVM内存大小
将ES软件包中的jvm.options中的JVM的内存进行修改。
/home/admin/softwares/elasticsearch/opendistroforelasticsearch-1.13.3/config/jvm.options/home/admin/softwares/elasticsearch/opendistroforelasticsearch-1.13.3_9201_9301/config/jvm.options/home/admin/softwares/elasticsearch/opendistroforelasticsearch-1.13.3_9201_9301/config/jvm.options
1 | ## JVM configuration |
注意:修改ES三个节点的JVM运行内存,这个可以根据需要更改,但是**-Xms和-Xmx**的值必须一样,不然启动报错*。
如果ES集群已运行,修改后,需要重新启动ES集群方可生效。
修改linux的最大打开文件数
可能出现的错误:
- max file descriptors [4096] for elasticsearch process is too low, increase to at least [65535]
- max number of threads [3539] for user [elastic] is too low, increase to at least [4096]
- max virtual memory areas vm.max_map_count [65530] is too low, increase to at least [262144]
- 修改Linux最大打开文件数
1 | [admin@node1 elasticsearch]$ vim /etc/security/limits.conf |
这一步需要重启linux使配置生效
1 | [admin@node1 elasticsearch]$reboot |
- 修改sysctl.conf文件
1 | [admin@node1 elasticsearch]$ vim /etc/sysctl.conf |
配置完,重启ES方可生效。
iptable以及防火墙
如果需要在其他机器上访问ES,则开放防火墙9200、9201、9202端口:
1 | # 允许所有ip访问本机的9200、9201、9202端口 |
具体的防火墙规则可以参考:【利用iptables实现简单的ES http端口访问限制】
 wechat
 alipay